
How to apply makeup for beginners comes down to two things, using fewer products than you think, and putting them on in the right order so your skin still looks like skin.
If you’ve ever finished your makeup and thought “why does it look patchy, cakey, or uneven,” you’re not alone, beginners usually get tripped up by prep, too much product, or rushing blending.
This guide keeps it practical, what to buy first, how to place product, how to fix common beginner problems, plus a small routine you can repeat on busy mornings without thinking too hard.
Start with skin prep: it changes everything
Makeup sits on top of skin, so if skin feels dry, textured, or oily in patches, your foundation will usually show it. Prep is not “extra,” it’s the cheat code.
- Cleanse gently, avoid squeaky-clean tightness.
- Moisturize and give it a minute to settle.
- SPF in the daytime, many people skip this, then wonder why makeup separates later. According to the American Academy of Dermatology (AAD)... daily broad-spectrum sunscreen is recommended to help protect skin from UV damage.
- Primer (optional) if you get separation, visible pores, or makeup slides off by lunchtime.
Quick rule: if your base looks bad, add less product and spend more time on prep, not the other way around.
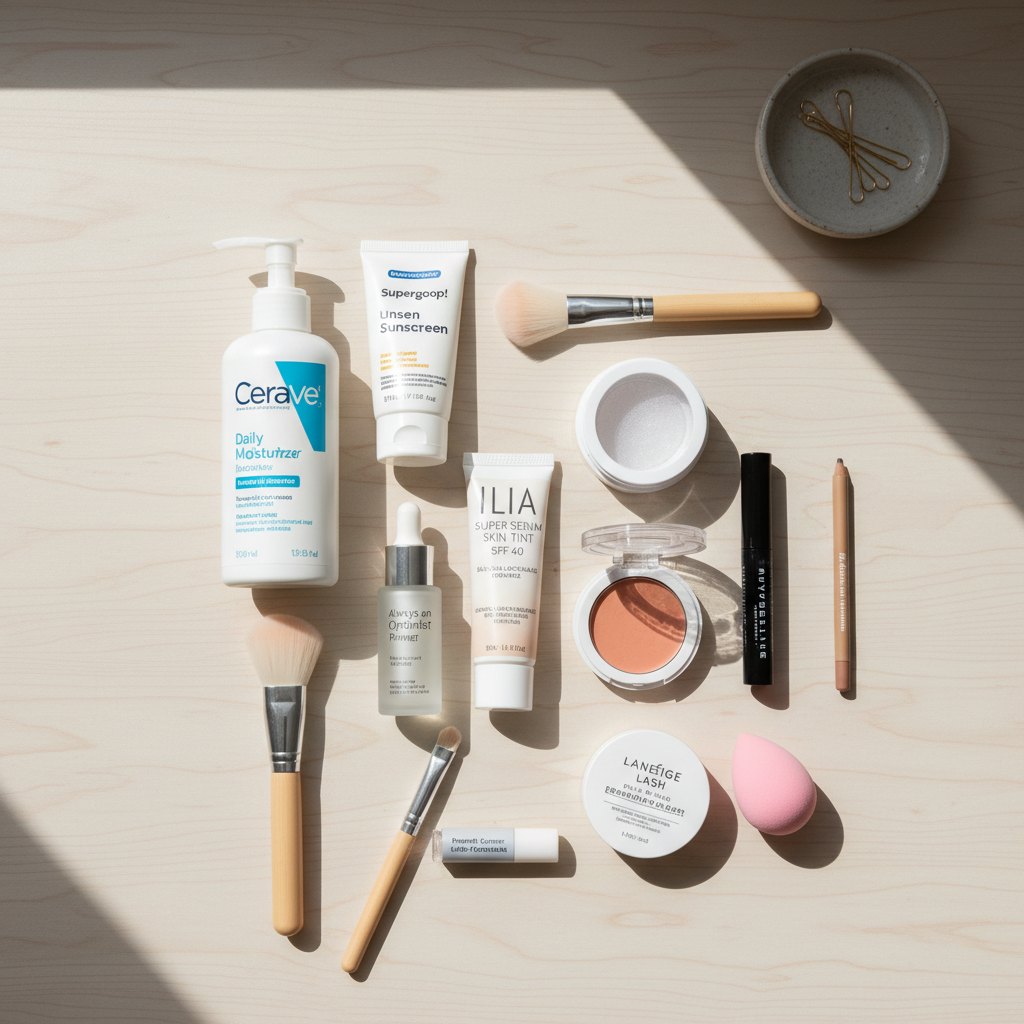
Build a simple beginner kit (don’t overbuy)
When people search how to apply makeup for beginners, they often assume they need a 20-step routine, you really don’t. A small kit reduces mistakes and helps you learn placement.
Core products to start
- Tinted moisturizer or light-coverage foundation
- Concealer (spot concealing beats full-face coverage most days)
- Blush (cream is forgiving)
- Mascara
- Brow pencil or gel
- Lip balm or tinted lip
- Translucent powder (optional, best for T-zone)
Tools that actually help
- Damp makeup sponge for a natural finish
- Small concealer brush for pinpoint coverage
- Fluffy blush brush if you use powder blush
If you’re on a budget, choose either a sponge or a brush to start, not both, learn one tool well.
The correct makeup order (easy to remember)
Most “my makeup looks weird” problems come from stacking products in a messy order. Here’s a beginner-friendly sequence you can repeat until it’s automatic.
- Prep: skincare + SPF
- Base: light coverage only where you need it
- Conceal: spots, then under-eyes if needed
- Set: powder only where you crease or get oily
- Color: blush, bronzer (optional), highlight (optional)
- Frame: brows + mascara
- Finish: lips, setting spray (optional)
Key point: when in doubt, keep the base light and focus on evenness, you can always add more, but taking off product mid-routine usually makes things patchy.
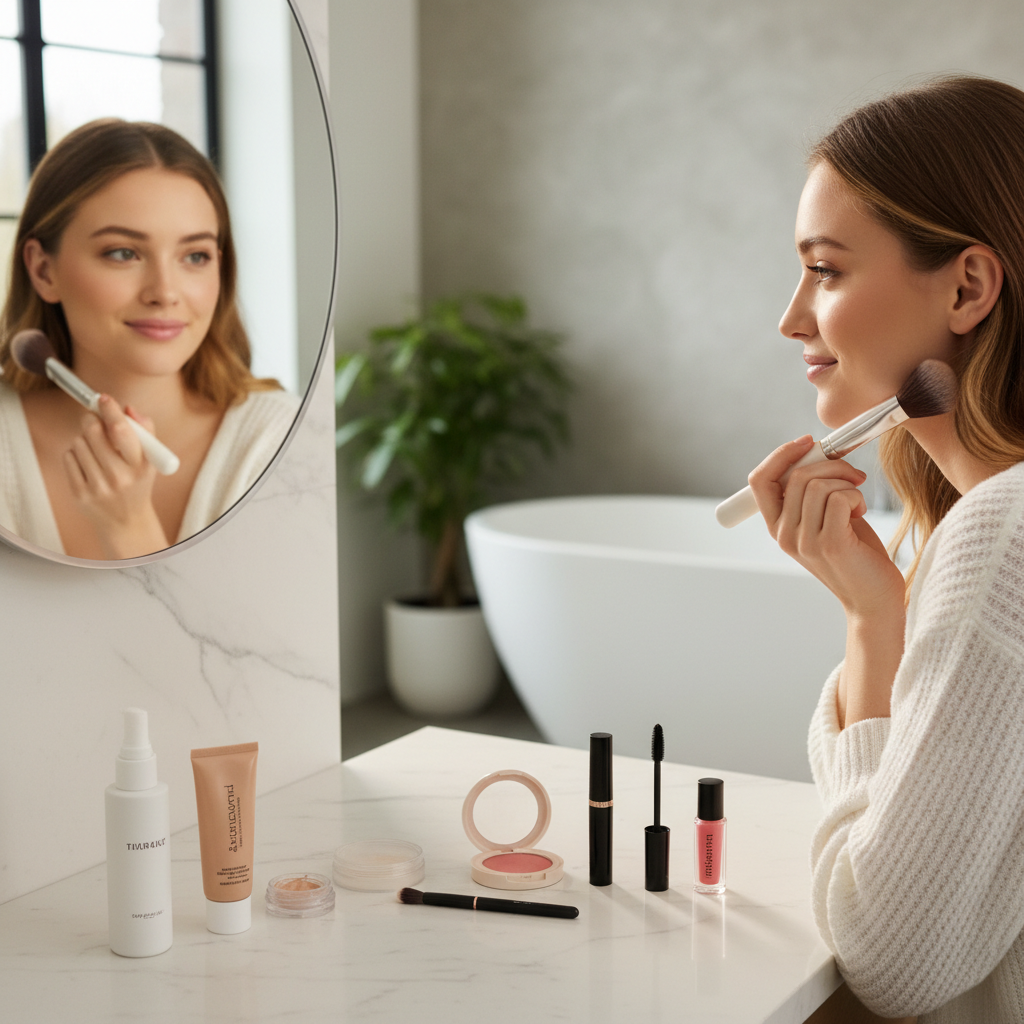
A beginner-friendly routine you can copy (10–15 minutes)
This is the “I want to look more awake, not like I’m wearing a mask” version of how to apply makeup for beginners.
1) Even out the complexion
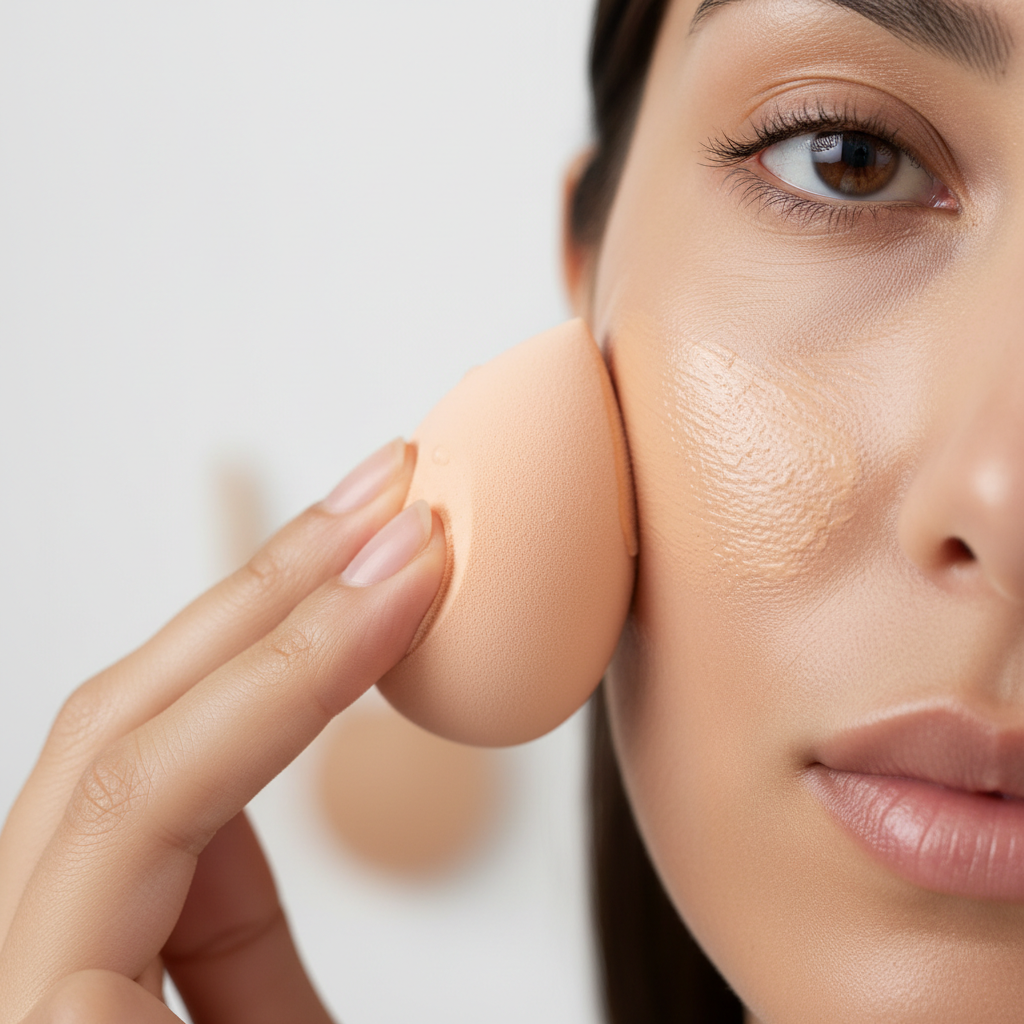
Use tinted moisturizer or light foundation in the center of the face first (around nose, cheeks, chin), then blend outward so the edges melt into skin.
- Apply a small amount, think pea-size.
- Press with a damp sponge, don’t drag.
- If you see texture, slow down and tap more, adding product rarely fixes it.
2) Conceal strategically
Spot conceal any redness or marks, then decide if under-eye concealer is even necessary. Many beginners over-conceal under the eyes and end up with creasing.
- For blemishes: place, wait 10 seconds, then tap edges.
- For under-eyes: use a thin layer on the inner corner and any shadow area, not all the way to the lash line.
3) Set only where makeup moves
Powder is useful, but too much makes everything look older and drier. Dust a small amount on the T-zone or where concealer creases.
4) Add blush (the fastest “alive” step)
Cream blush is beginner-friendly because you can tap it into place. Put it slightly higher than you think, then blend toward the temple for lift.
5) Brows and mascara
Light brows make the face look unfinished. Heavy brows can overwhelm. Aim for small strokes and a soft shape, then mascara to open the eyes.
- Brush brows up, fill gaps lightly, then brush again to soften.
- Wiggle mascara at the roots, then pull through the tips.
6) Lips
Start with balm or a tinted lip. If lipstick feels intimidating, a tinted balm is the easiest win.
Self-check: what’s going wrong with your makeup?
If your results look “off,” it’s usually one of these patterns. Use this checklist to diagnose before you buy more products.
- Cakey around nose or mouth: too much base, not enough moisture, or powder everywhere.
- Foundation separating: skincare and base formulas may not play well, or skin is getting oily, try primer or less product.
- Concealer creasing: too thick, too dry, or you set too late, use less and set lightly.
- Patchy blush: base not set evenly, or you’re dragging a brush over tacky foundation.
- Makeup fades fast: oily T-zone needs targeted powder, or you need a setting spray.
Practical test: try the same routine with half the product amount. If it looks better, the problem was “too much,” not “wrong product.”
Quick fixes and a simple table for common mistakes
Beginners usually improve fastest by fixing one step, not changing everything. Here’s a quick reference you can screenshot.
| Problem | Likely cause | Fix to try next time |
|---|---|---|
| Dry, flaky base | Not enough moisture, too much powder | Moisturize more, powder only T-zone, switch to dewy base |
| Oily shine by midday | Too rich skincare, no targeted setting | Use lighter moisturizer, set T-zone, blot before re-powdering |
| Visible pores/texture | Thick foundation layer, dragging sponge | Sheer out base, press product in, consider pore-blurring primer |
| Orange or gray tone | Wrong undertone match | Match to jaw/neck in daylight, try neutral undertone options |
| Mascara smudging | Oily lids, wet formula | Light powder on lids, try tubing or waterproof mascara |
Key takeaways: use less base than you think, blend by pressing not rubbing, and set only the areas that actually move or get oily.
When to ask for help (and what to ask)
If you keep breaking out, getting itchy, or seeing persistent redness after makeup, it may be sensitivity or an ingredient issue, and it’s reasonable to stop and consult a dermatologist or qualified professional.
For color matching or technique, a quick session at a reputable makeup counter or with a makeup artist can save you months of trial and error, bring your own products and ask for a routine you can repeat, not a full glam look you’ll never do.
Conclusion: keep it light, keep it repeatable
Once you understand how to apply makeup for beginners, the goal shifts from “cover everything” to “enhance what’s already there,” a little base where needed, a touch of color, and clean definition around eyes and brows.
If you want a simple next step, pick one routine from this article and repeat it for a week, then adjust only one variable at a time, usually either base amount, powder placement, or blush positioning.
FAQ
- How do I apply makeup for beginners if I have acne?
Go lighter on foundation and use spot concealing, thick layers tend to emphasize texture. If acne is inflamed or painful, a dermatologist can help you choose skin-safe options. - Do I need primer as a beginner?
Not always. Primer helps most when makeup separates, pores look emphasized, or you get oily fast, otherwise you can skip it and spend that budget on a better base match. - What’s the easiest foundation type for beginners?
Tinted moisturizer or light-coverage skin tint is usually the most forgiving because small blending mistakes don’t show as much as full coverage. - Why does my concealer crease under my eyes?
Most of the time it’s too much product or it’s too dry. Use a thin layer, tap it in, then set lightly where you crease. - How can I make my makeup look more natural?
Use less base, blend outward from the center, keep powder minimal, and choose cream blush or sheer powder formulas that build slowly. - What order should I do eyes and face makeup?
For everyday looks, do face first. If you’re using messy eyeshadow or glitter, do eyes first so you can clean fallout without disturbing foundation. - How do I find my shade and undertone in the US?
Test along the jawline in natural light and let it sit a few minutes to see if it oxidizes. If you’re between shades, many people look more natural with a slightly lighter, neutral option rather than warmer.
If you’re practicing how to apply makeup for beginners and you want a more foolproof setup, it often helps to build a “capsule routine” around one base product, one concealer, one blush, and one mascara, then refine shades and finishes once the technique feels easy.